If you have registered your domain with GoDaddy and you use their DNS servers, you can set the MX records with GoDaddy’s DNS manager by following this instructions.
1. Login to your GoDaddy account and go to domain manager whre all of your domains are listed. Find the domain you wish to edit, click ... icon near the domain name and select **Manage DSN**
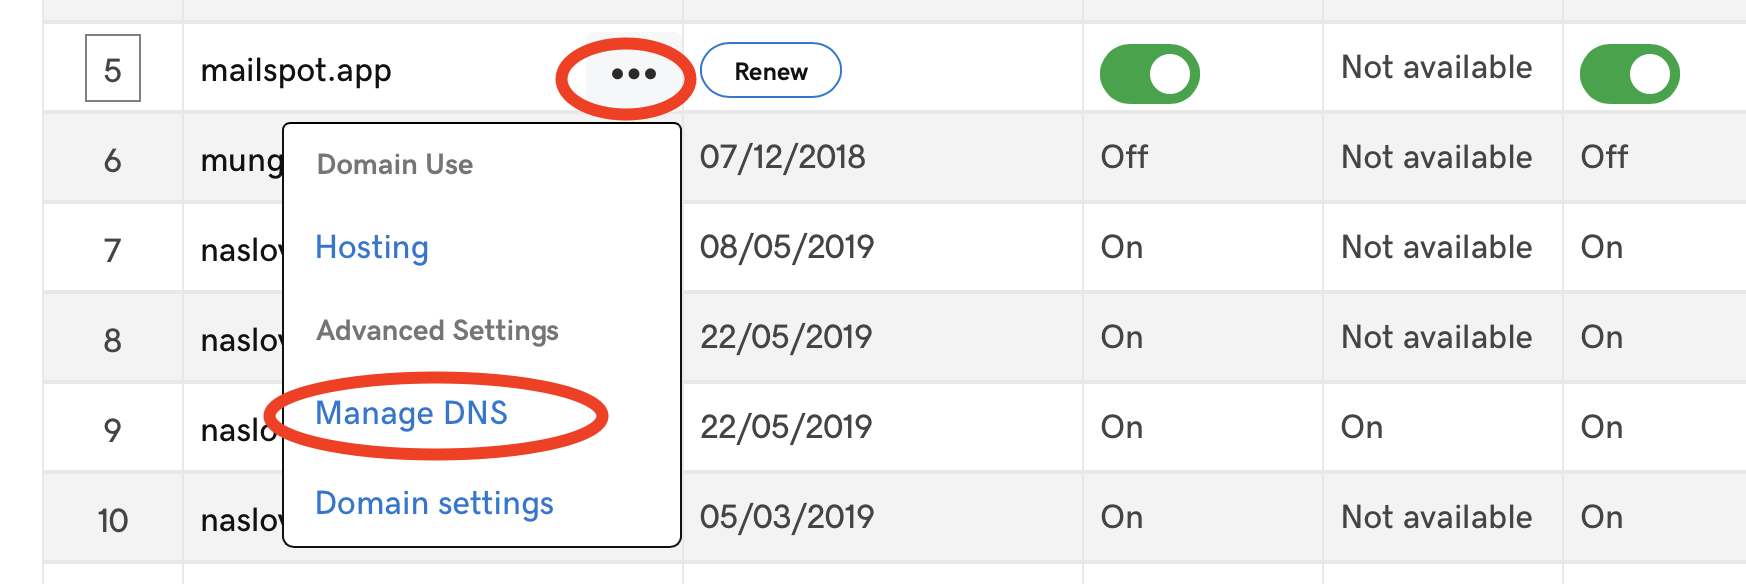 Alternativly, you can click on this link and you will be able to directly access DNS manager by clicking the domain name.
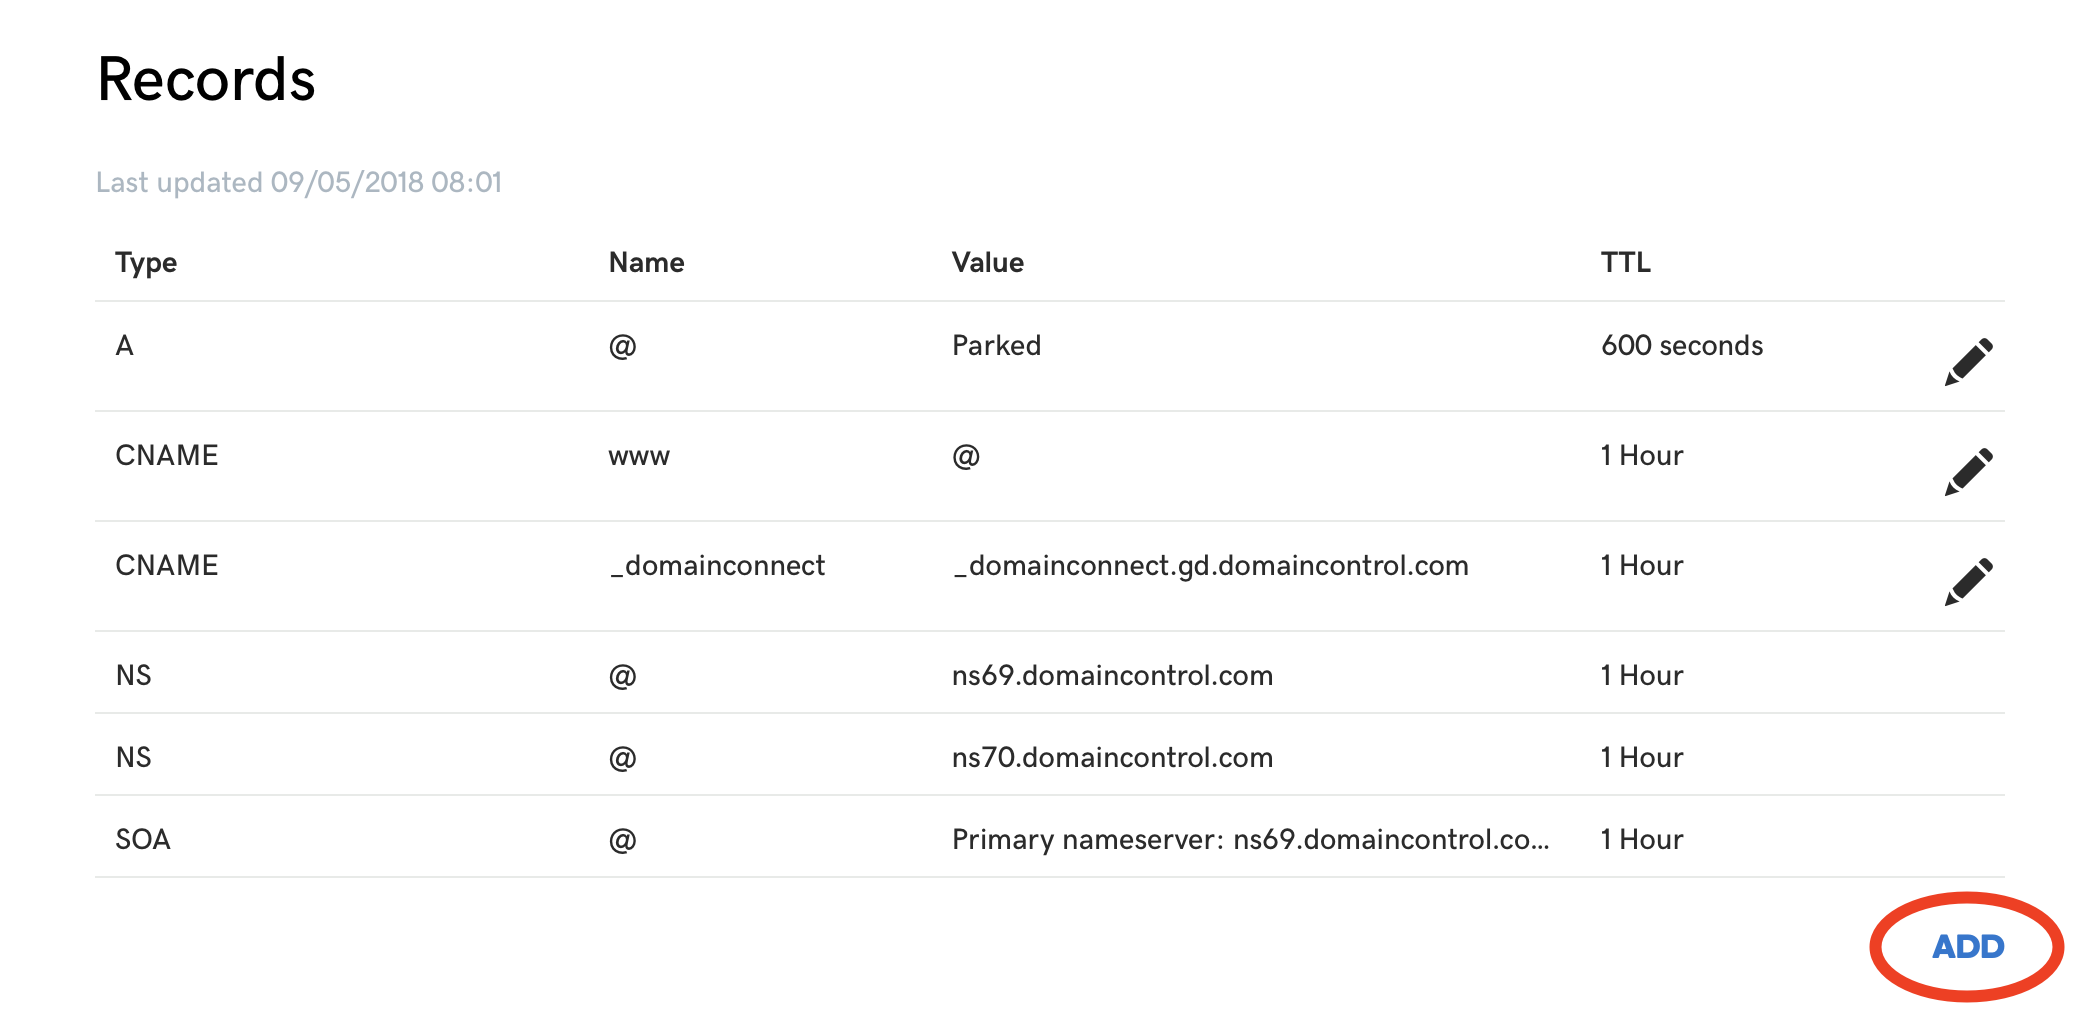
2. Now you should be in DNS manager. Click “ADD” in right bottom corner for each record you want to add.
Alternativly, you can click on this link and you will be able to directly access DNS manager by clicking the domain name.
2. Now you should be in DNS manager. Click “ADD” in right bottom corner for each record you want to add.
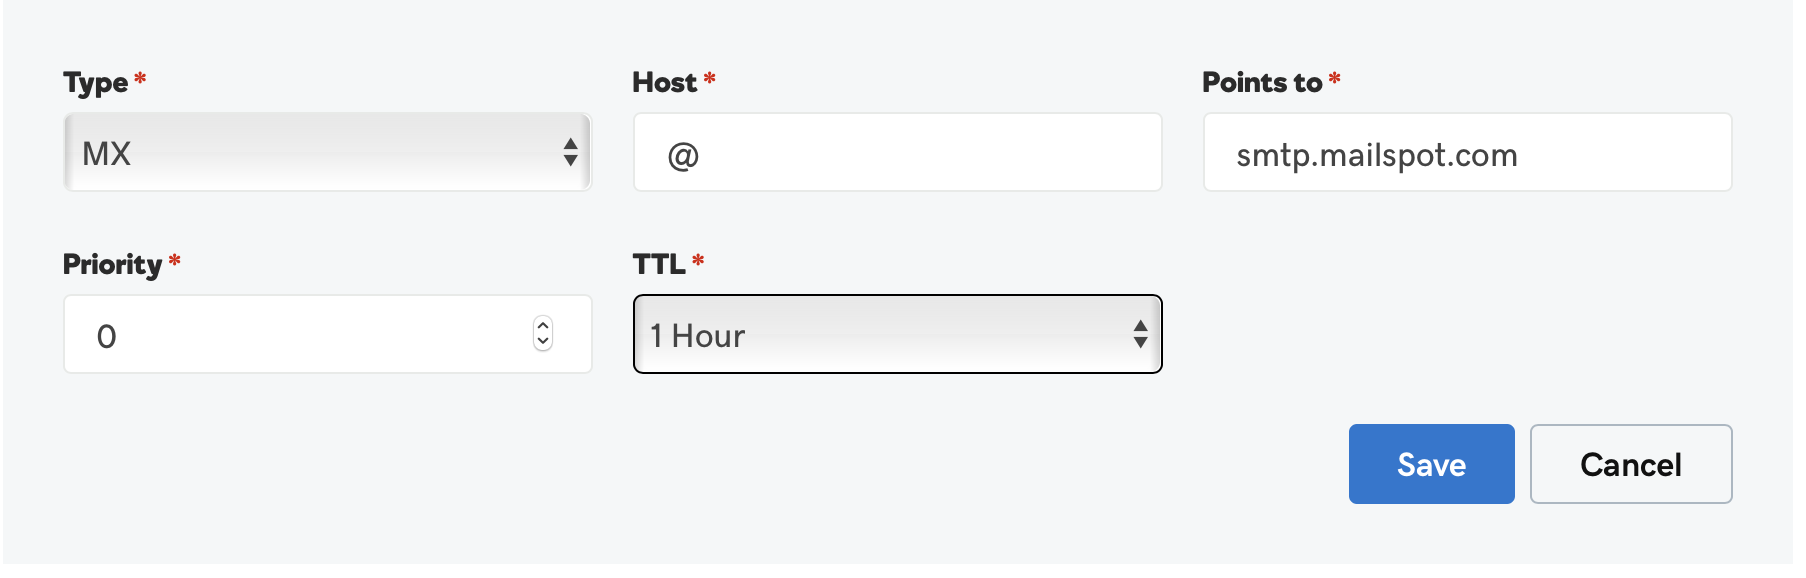
 3. Add first MX record by selecting type
 MX and by filling the form like on the picture belowe. Our primary SMT server is smtp.mailspot.com with priority 0. Click Save to save the changes.
Click ADD in bottom right corner and add second MX record
backupmx.mailspot.comwith priority10. Click Save to save the changes.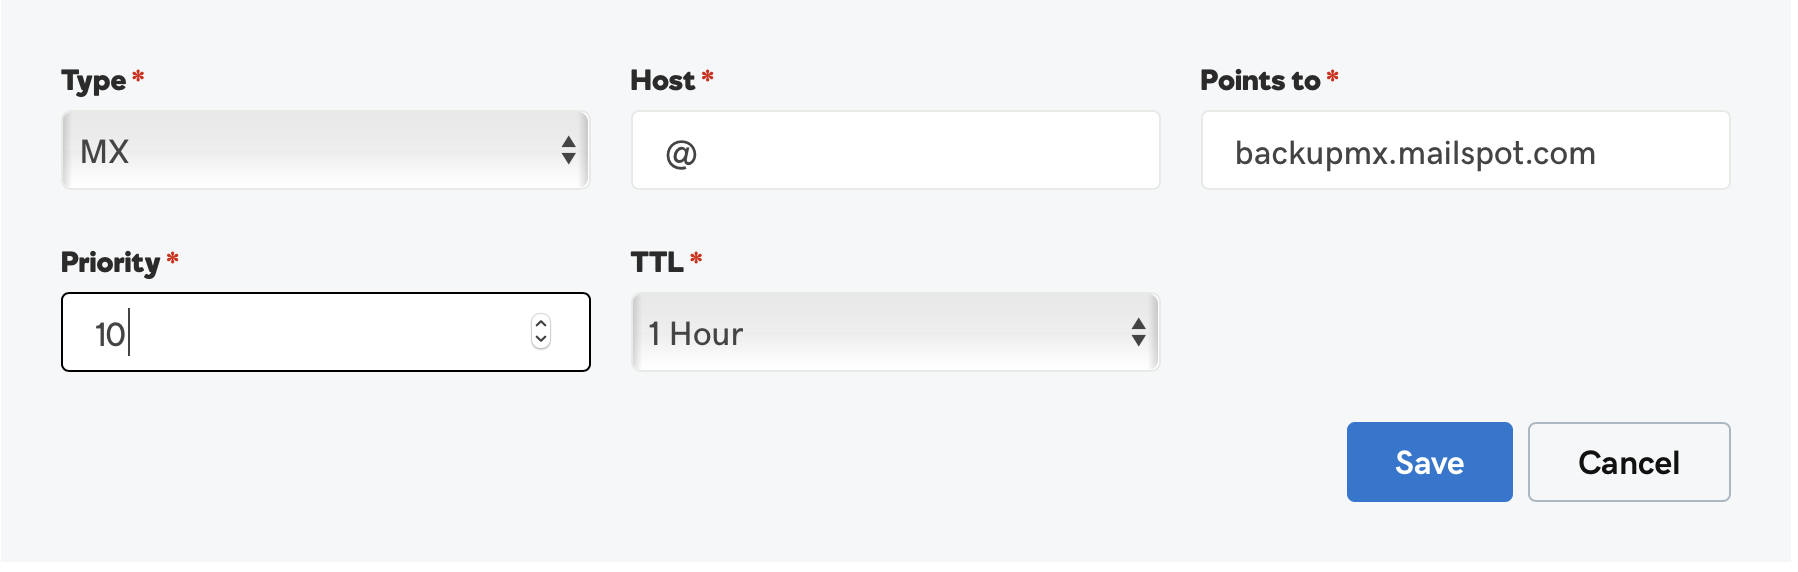
You are done. You should see both of the MX records listed in your GoDaddy DNS manager.
 Whait for a while for changes to take affect and you are ready to receive emails through Mailspot.com. Keep in mind, that if you already have existing MX record you should remove them, or edit them instead of adding new ones.
While you are already in DNS manager, you can set the SPF record right away if you are going to send emails through Mailspot.com.